


Photos: Atlas Roofing
Many contractors treat residential roofing as routine. However, whether a re-roof or new construction, each project can be infinitely complex and should be addressed as such by always accounting for weather and safety issues, as well as proper installation and customer service.
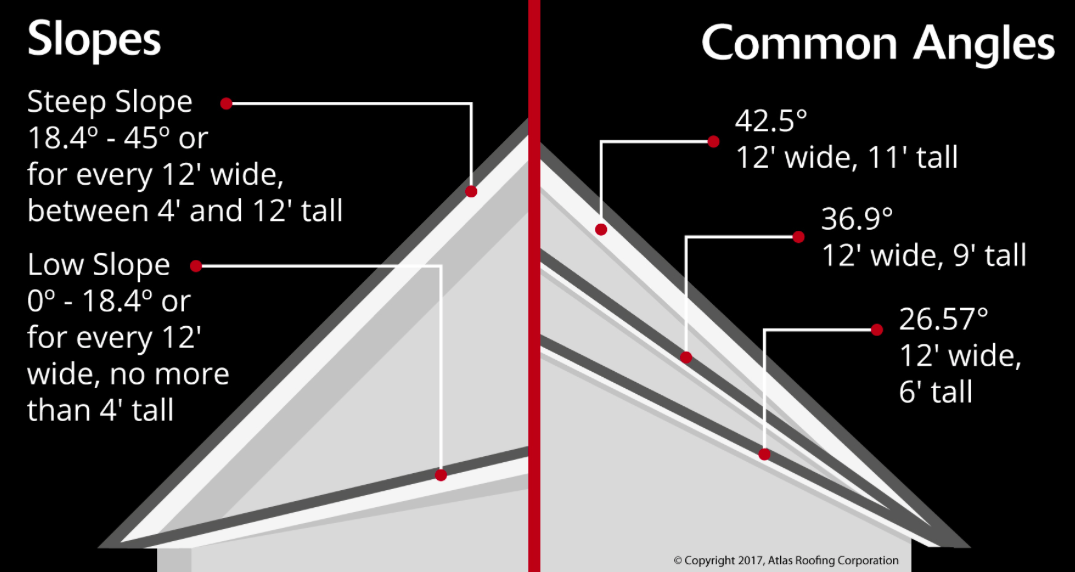
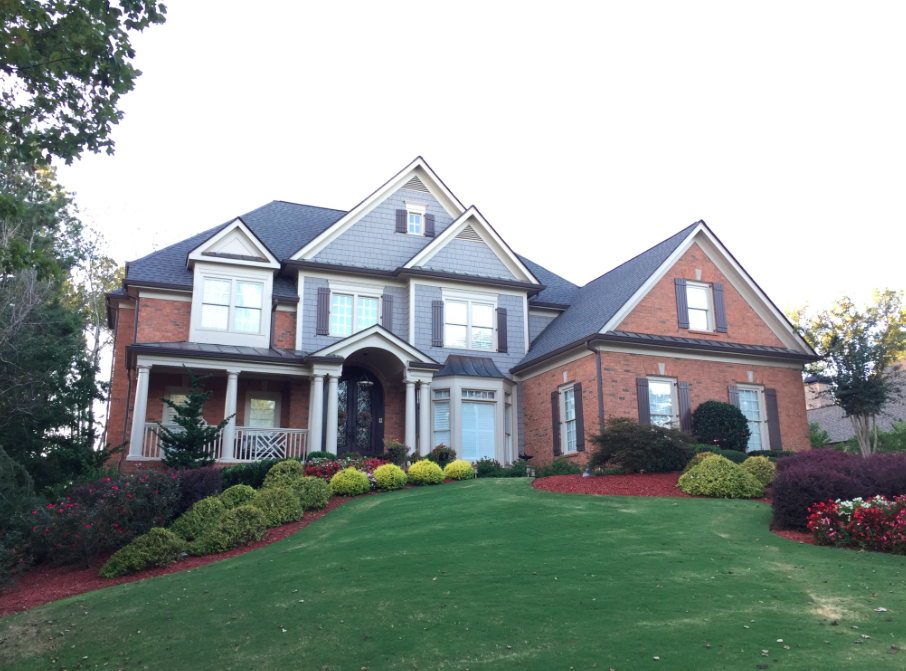
One of the most prominent and popular elements of residential architecture is a steep-slope roof. According to the Occupational Safety and Health Administration (OSHA), steep-slope roofs have slopes greater than 4:12 and range from 18.5 degrees to 45 degrees or more. While the process of installing a roof with these angles isn’t necessarily much different from a low-slope roof, it can pose more risks and considerations for workers.
Weather Woes
Weather plays an important role in every roofing project, but staying on top of potential issues from Mother Nature is especially crucial during steep-slope jobs.
Photos: Atlas Roofing
In high temperatures, workers may fall victim to heat cramps, heat exhaustion, heatstroke or worse. The best way to beat the heat is to start early and get as much done as possible before the temperature peaks. Starting early in the summer—specifically in the South—can allow work to be completed before daily rain showers roll in. Proper hydration and attire are also important.
Cold temperatures can create even more complications because some manufacturers advise against installing their products in weather below 45 degrees Fahrenheit and certain equipment is susceptible to freezing. Furthermore, workers have to pay extra attention to the grip of their shoes to avoid slipping and falling. Not to mention, freezing-cold hands and feet may cause an otherwise adept worker to become clumsy. Wearing the proper clothing is key during cold-weather jobs, and workers should be advised to keep an eye out for the first signs of frostbite, including cold skin, redness, tingling and numbness.
Safety Considerations
In 2015, falls were the leading cause of private-sector work deaths in the construction industry, accounting for nearly 40 percent of worker fatalities, according to OSHA. In addition, OSHA reports nearly 90 percent of fatal falls happen due to the lack of a fall-protection system.
Photos: Atlas Roofing
When working on a roof slope greater than 4/12, OSHA requires additional safety measures, which include either a guardrail system with toeboards, safety net systems or personal fall arrest systems. Yet, many contractors—especially residential roofers—choose to forgo protective devices because they feel they are not feasible or create a greater hazard. In such cases, OSHA does allow the use of alternative fall-protection methods in residential construction, as long as contractors develop a written, job-specific fall-protection plan that complies with OSHA regulations.
Proper Installation
During the installation process, roofers should keep a few things in mind whether they’re applying shingles to a steep-slope or low-slope structure.
- Valleys
Photos: Atlas Roofing
Valleys are a critical part of proper roof installation because they experience the most water flow during rainstorms and can be potential leak points.
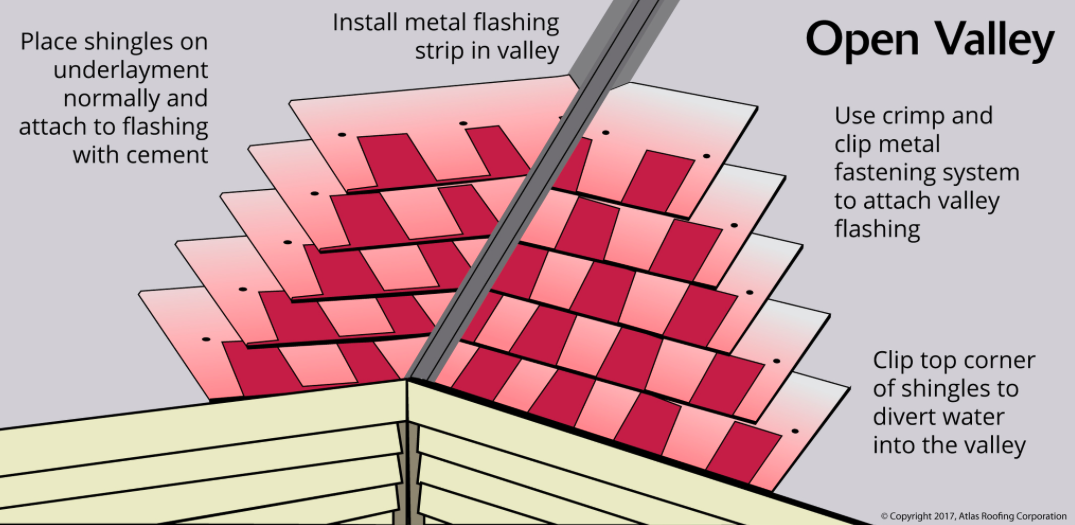
In an open valley, a piece of aluminum, copper or other type of metal is used to help keep rainwater flowing off the roof. Open valleys are often used when a homeowner wants a showier look, such as on a Colonial-style home.
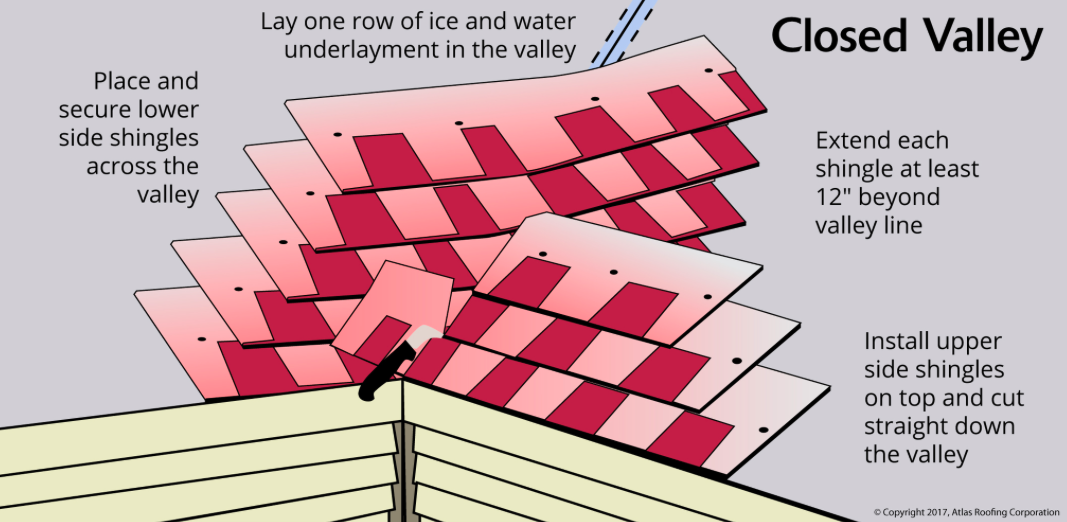
Closed valleys—the most common valley installation method—use asphalt shingles and offer a more traditional look. When properly installed, they keep water from getting trapped in the valley and allow for proper drainage.
In addition to open and closed valleys, contractors also have the option to create a weave valley, which alternates shingles through the valley from both sides, creating a braid-like effect.
Laminate/architectural shingles should not be used for weave valleys. Because laminate shingles aren’t one-dimensional, they do not create the flat surface needed for a weave valley, which should only be used with three-tab shingles.
When using laminate shingles, be sure to follow instructions on the wrapper for either an open or closed application.
Contractors also need to be extremely careful around obstacles such as chimneys and skylights, which require their own flashing and water divergence methods. For instance, more flashing may be needed in these areas to divert water and prevent leaks.
- Starter Shingles
Starter shingles allow the first course of shingles to properly seal down, protecting the edge of the roof and providing anchoring power for high-wind resistance at the critical eave and rake areas. They further protect the roof by filling in spaces under the cutouts and edges for the first course of exposed shingles, preventing wind uplift.

Photos: Atlas Roofing
The most common mistake when installing starter shingles or modifying traditional three-tab shingles is putting them on backward or upside-down.
Additionally, the overhang should be no more than three-quarters of an inch to prevent wind from penetrating beneath shingles, as well as to keep shingles from curling or cracking.
In addition, many manufacturers caution against double-stacking pallets of starter shingles, which can cause the bottom shingles to warp. Be sure to read all storage and handling instructions prior to installation.
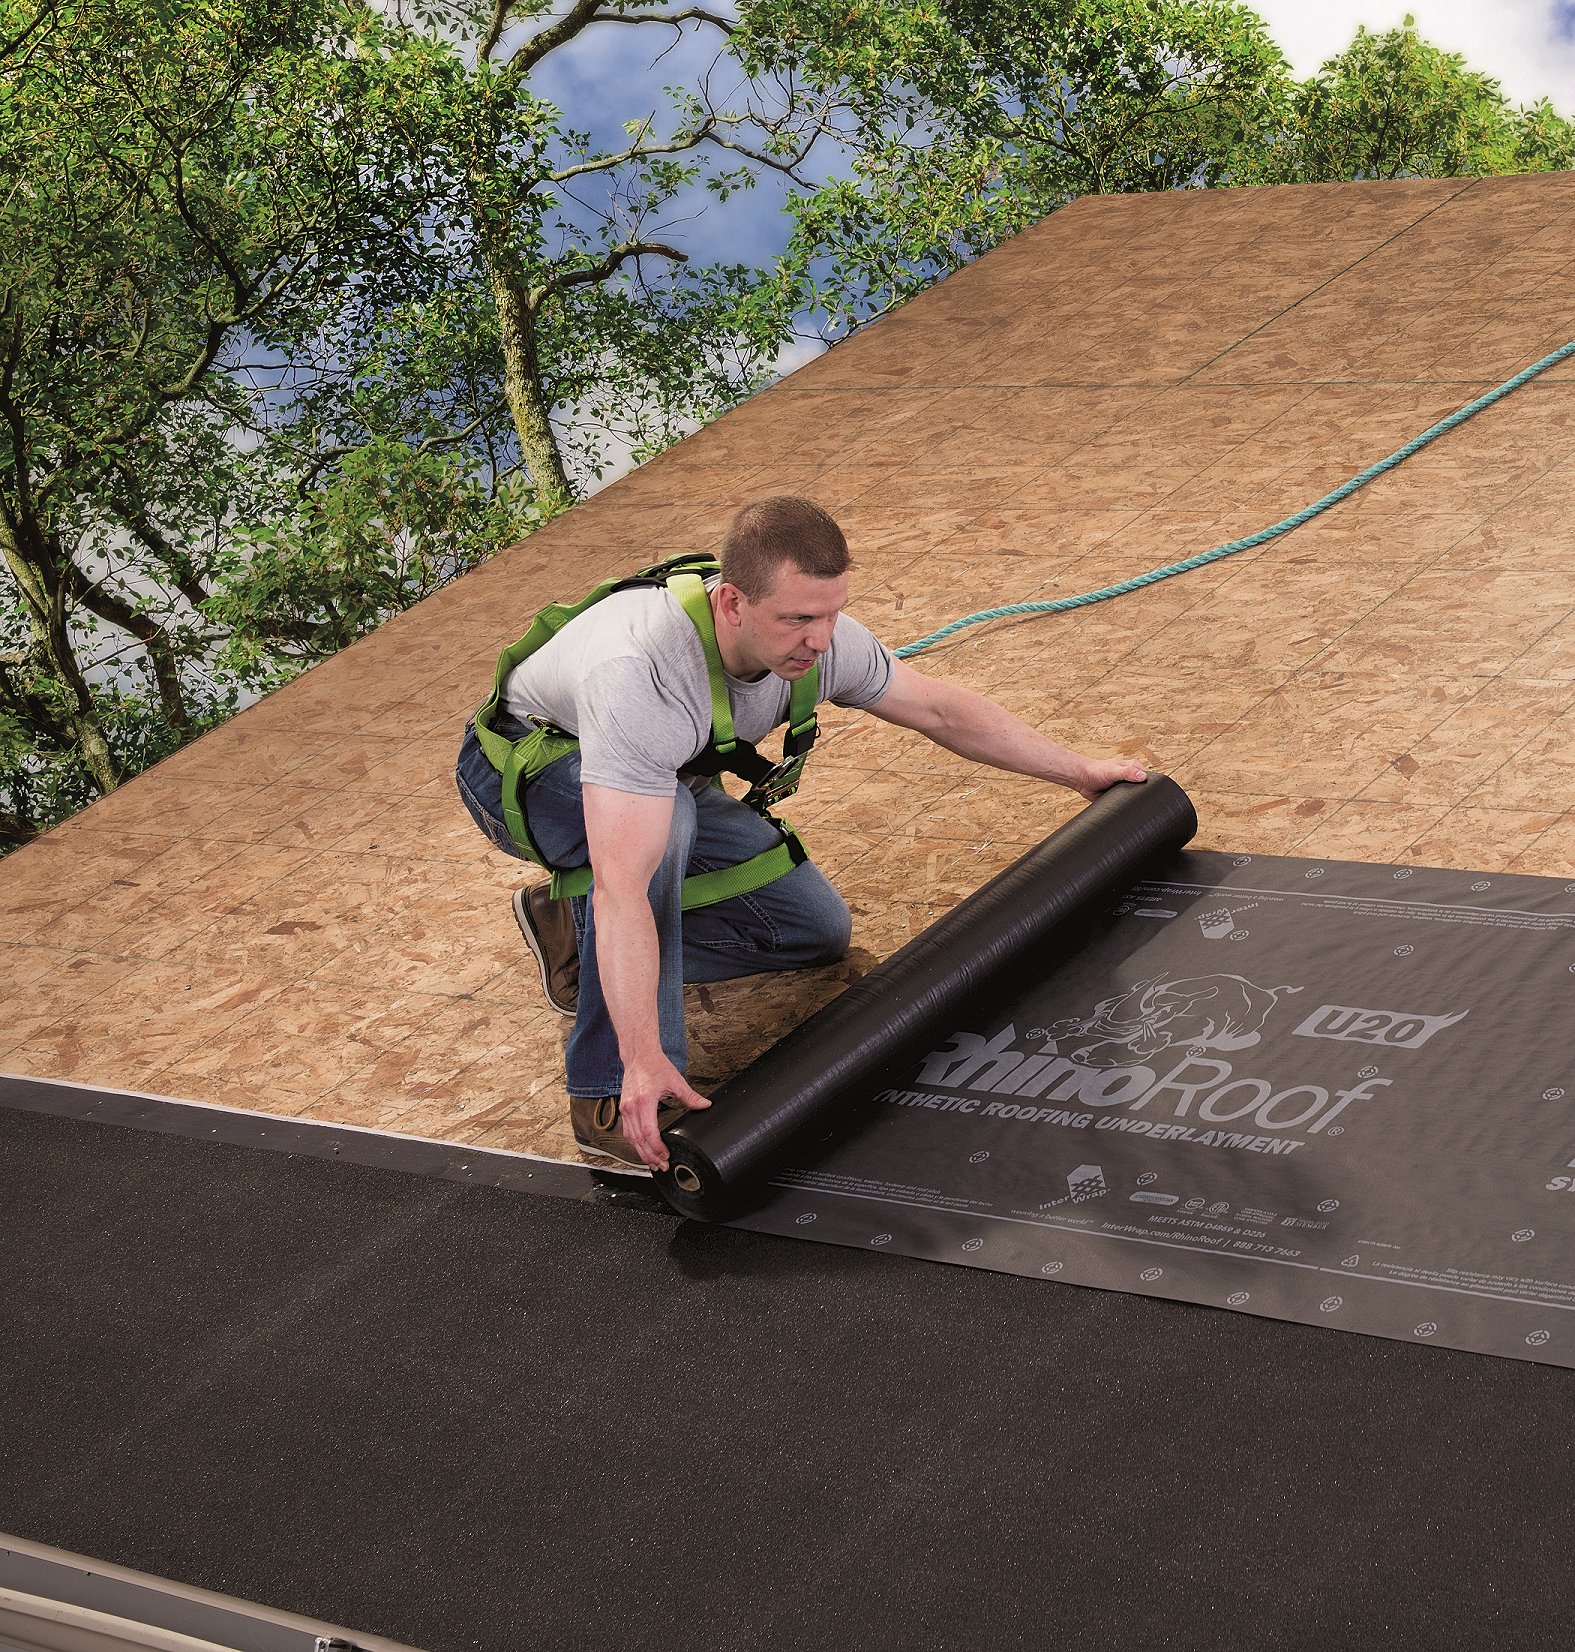
- Underlayment
Underlayment is an important part of the roofing process and is required by code for residential properties to meet Class A fire requirements. Serving as a secondary barrier, underlayment protects rakes, eaves and critical flashings from water infiltration. Most warranties also require underlayment for the roof to be ASTM compliant. However, some contractors still opt not to use it because they want to save time on a project or their customer balks at the cost.
Photos: Atlas Roofing
Another frequent error during underlayment installation is incorrect overlaps. On low-slope roofs (slopes between 2:12 and 4:12), underlayment should have double coverage. And while traditional installation is fine on steep-slope roofs, always follow manufacturer instructions for overlaps from course to course.
Last but not least, be sure to keep underlayment from wrinkling, which can cause ripples in the shingles. While trying to keep underlayment as flat as possible, avoid pulling it too tight because it has a natural expansion and contraction. If underlayment gets wet, be sure it adequately dries out before continuing the installation process.
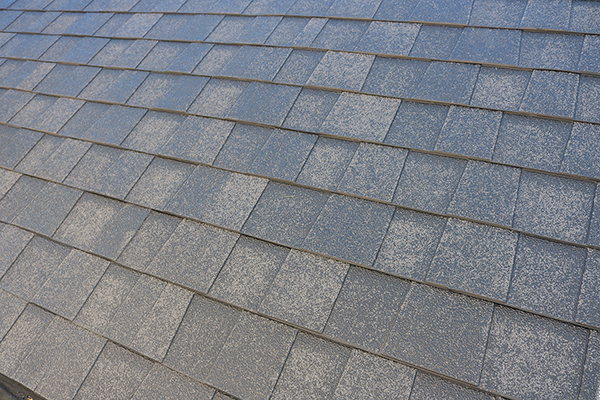
- Shingles and Nails
Shingles should be installed with the manufacturer’s recommended offset, which will help prevent leak points and also properly align the shingles across the roof. Once all of the shingles are aligned, only the shingles themselves should be exposed—not the nails.
Because the common bond area is the strongest part of a shingle, manufacturers require nails be placed there to achieve the advertised wind performance. Nails should not be too high or too low, or unevenly spaced. If nails aren’t positioned correctly, the manufacturer’s wind warranty may not be valid.
Customer Service Follow-Up
Providing excellent customer service is key to every roofing job. Homeowners who have a good experience are more likely to share positive reviews and opinions.
Photos: Atlas Roofing
Before starting a steep-slope project, be sure to discuss the entire process with homeowners to ensure that they know what to expect, as well as the types of warranties they will receive with their new roof. In addition, prepare the surrounding property, such as windows and landscaping, to prevent damage during the installation process.
During the job, be sure workers are vigilant about not dropping nails anywhere on the jobsite. After the job, walk the property with the homeowners to ensure all debris and materials were cleaned up; magnets can be used to double-check for stray nails. If the homeowners are happy with the finished product and their experience, don’t be afraid to ask them to write a nice review on the company website, Angie’s List, Yelp or other customer referral app.
Most of the best practices for steep-slope roofing can be applied to any type of roofing project. However, steep-slope work can pose additional challenges that other projects may not. Always follow manufacturer’s instructions and OSHA guidelines on all roofing jobs, but especially on steep-slope projects, when one minor slip could turn into major consequences for all involved.
About the Author: Paul Casseri is the product manager of the Roofing Shingles and Underlayment Division for Atlas Roofing Corp., www.atlasroofing.com. He is responsible for all areas of product management, including product initiation, feasibility, design, development and testing. He is a graduate of Penn State University with more than 20 years of experience in the building products industry.


Be the first to comment on "Steep-Slope Projects: Risks, Considerations and Best Practices for Contractors"