
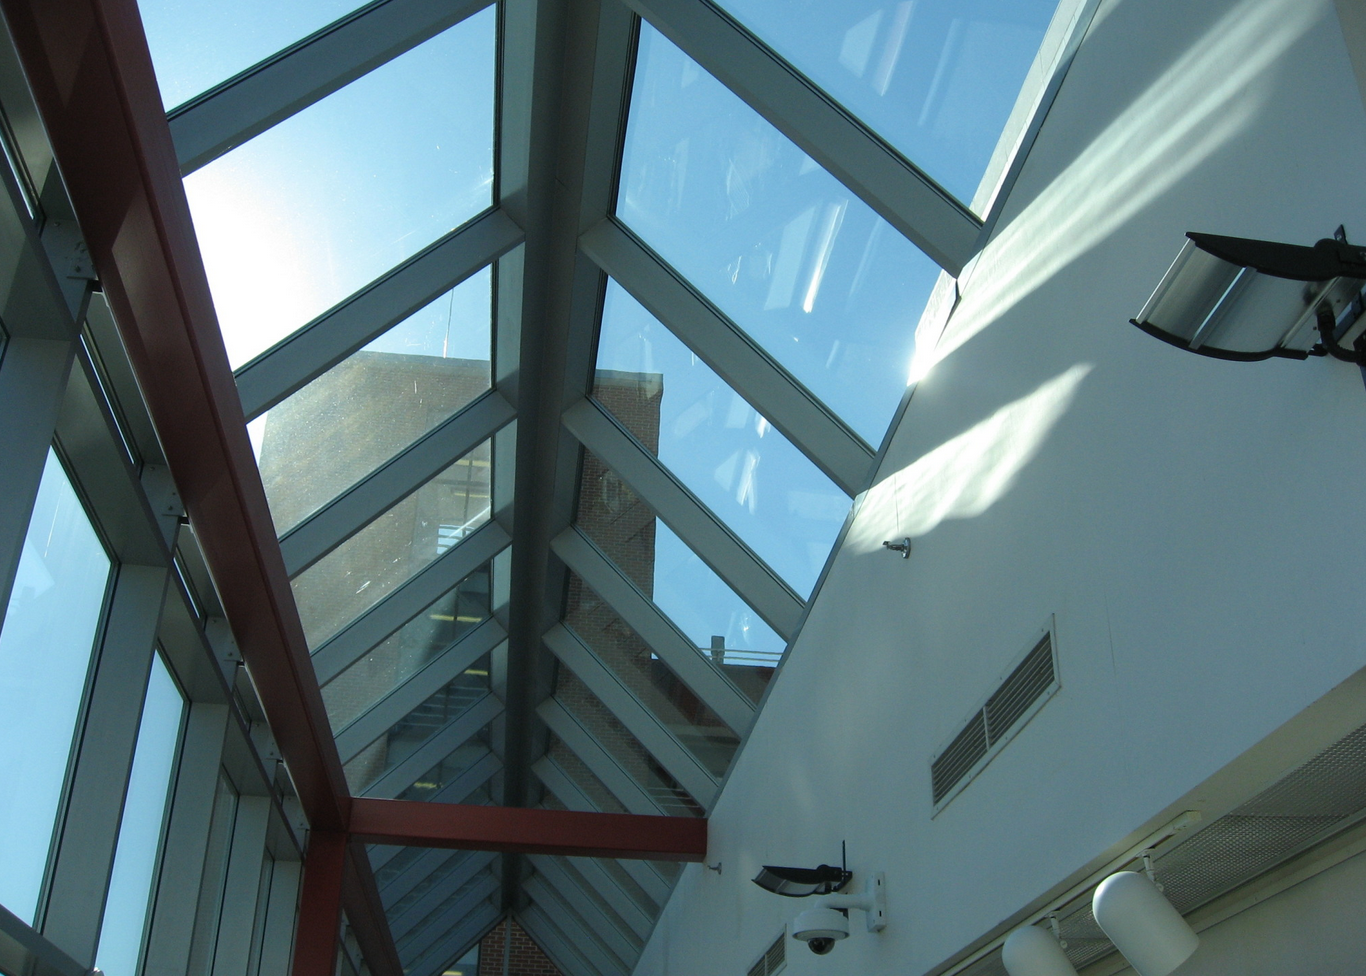

The building in question features one whole face that is an aluminum-framed glass curtainwall. The curtainwall extends up above the roof lines, slopes up (from the vertical) forming a peaked skylight, which then slopes back toward the roofs that were holding water.
I responded by immediately going to the building. I was accompanied by the roofing system manufacturer. As the client led us around the building, water was dripping through suspended ceilings all over, which gave us the sinking (almost apocalyptic) feeling you hope to never know. However, when we went up to examine the roof, much to our surprise, there was no blow off; no seams torn; in fact, no apparent defects at all. Our thermoplastic cap sheet looked perfect on the surface.
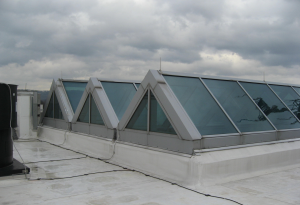
On the upper roof, aluminum-framed sawtoothed skylights were dripping water when the team first arrived. This gave the only clue to where the “smoking gun” may lie.
What we did find, however, was large amounts of water trapped between this cap sheet and the 90-mil bituminous base sheet underneath. This was creating large water-filled blisters on the roof that looked like an old waterbed as you walked up to and around them. No matter how hard we looked we just couldn’t find defects in the membrane surface or at any of the flashing connections or terminations that could be causing this. There was, however, a likely suspect looming adjacent to and above our roofs. The building experiencing the roof leaks has one whole face that is an aluminum-framed glass curtainwall. It extends up above the roof lines, slopes up (from the vertical) forming a peaked skylight, which then slopes back toward these roofs that were holding water. On the upper roof, sawtoothed skylights of the same construction were dripping water when we first arrived. This gave the only clue to where the “smoking gun” may lie.
METHODOLOGY
Water was dripping from the saw- toothed skylights into a planter in the 4-story atrium. The client said that was typical with all hard rains. Armed with this clue, and no other apparent explanation for such a large amount of water intrusion, the owner engaged us to find out what indeed was the root cause of this problem.
On the upper roof, aluminum-framed sawtoothed skylights were dripping water when the team first arrived. This gave the only clue to where the “smoking gun” may lie.
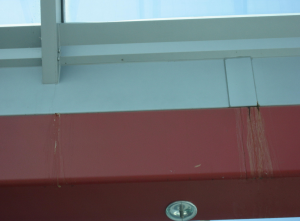
First, we plugged the roof drains and let water pool on the roof until the en- tire surface was wet. Meanwhile, “spot-ters” inside the building were looking for any sign of water intrusion using lights above the dropped ceilings. When this showed nothing, we began constructing spray racks and running water for set intervals on every adjacent surface rising above and surrounding the lowest roof in question. We first sprayed the exposed base flashings, then rose up to the counterflashing, then further up the wall, then to the sill of the windows above, etc. Then we would move laterally to a new position and start again.
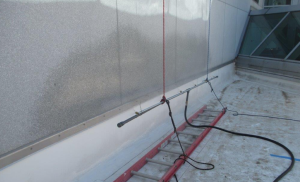
The team first sprayed the exposed base flashings with water, then rose up to the counterflashing, then further up the wall, then to the sill of the windows above, etc. Testing moved laterally to a new position before starting again.
This proved painstakingly tedious, but we knew that making the building leak was not enough; we had to move slowly and systematically to be able to isolate the location to determine what exactly was leaking and why. It is important when applying water this way to start low and only after a set period move upward, so when water does evidence itself as a leak, you know from what elevation it came.
After an entire day of spraying the rising walls surrounding the first (low) roof area, we could not replicate a leak. Somewhat frustrated—and rapidly burning the testing budget—we began the second day focusing on the adjacent peaked skylight, which is more than 75- feet long.
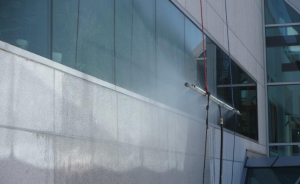
The team first sprayed the exposed base flashings with water, then rose up to the counterflashing, then further up the wall, then to the sill of the windows above, etc. Testing moved laterally to a new position before starting again.


Be the first to comment on "Locating the Source of Water Intrusion Can Be Tricky"