
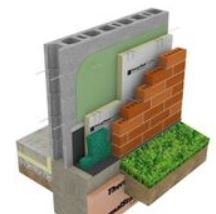
CASE STUDY NO. 1
The school district had scheduled the high school’s roof replacement, but my colleagues from USA Architects Planners + Interior Designers, Easton, Pa., and I quickly recognized concerns with the existing parapet wall (see the “before” photo on page 1). The multi-wythe solid brick wall had a cast-stone cornice (decorative on the street-facing side) and a cast-stone coping at the top. Many of the joints in these masonry elements were open, or cracked, and allowing water into the wall. In turn, freeze-thaw cycles were starting to increase the rapidity of the deterioration.
Click to view larger version
In the “after” photo, page 1, you see the new thermoplastic flashing membrane covering the wall. It was run up and over the original stone coping and anchored on its outside face. A new pre-engineered/pre-manufactured metal coping system was used to cover the original stone coping, thus eliminating the need for redoing and maintaining the head and bed joints therein.
Notice a new two-piece metal counterflashing about 12 inches up from the bottom of the wall. The counterflashing allowed for the second phase of work, which was to replace the roof as originally intended. The proper phasing of the work allowed not only the “rougher” elements, but the “upper” elements of the work to be done (made waterproof) first before the new roof was installed below. This also avoided potential damage to the new roof from trafficking over it with masonry, plywood and construction debris.
CASE STUDY NO. 2
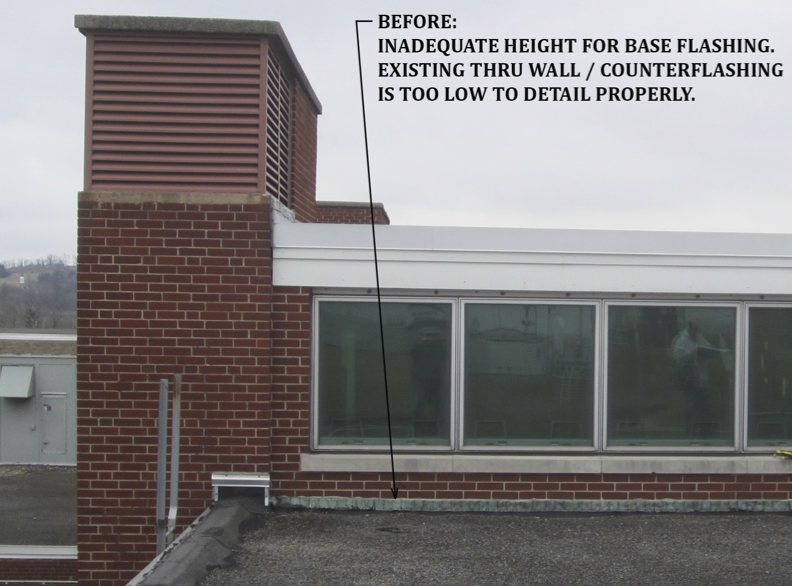
The existing roof was scheduled to be removed and replaced by the school district. At the start of the investigation/ design phase of the project, we immediately realized a potential problem in the connection at the rising wall, depicted in the “before” photo, this page. Calculations proved that when new insulation, which had to be thicker (for the required R-value) and tapered (to provide slope to the drains), was made part of the new roof system, the top surface of the new roof would be too high to properly detail the flashing at this connection. This was due to the location of the existing through-wall counterflashing and the weep holes in the brick above it. Most manufacturers are looking for 6 to 8 inches of vertical dimension in the base flashing from the roof surface to the bottom of the counterflashing above.
Click to view larger version
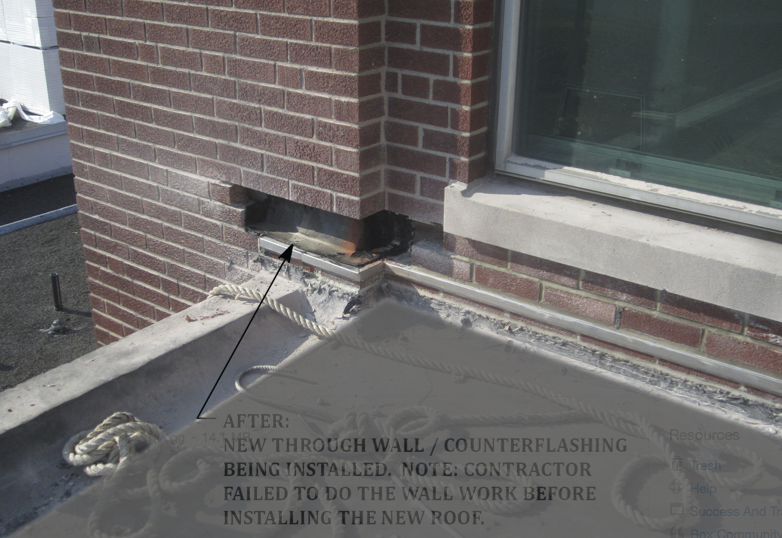
In the “after” photo, this page, the contractor is in the process of cutting out short sections of the brick wall to raise the through-wall flashing and weeps in the brick cavity, so the counterflashing can be raised to match. This allowed the contractor to increase the vertical dimension of the base flashing between the roof surface and the raised counterflashing. To accomplish this, the contractor was required to work on short sections, approximately 2 feet in length. He would remove a section, skip a section and remove the next, so the alternate sections left in place supported the weight of the brick above while he rebuilt the sections in between. After the first half was complete, the contractor removed and rebuilt the masonry in the alternate remaining sections. This process was costly and somewhat tedious.
In the “after” photo, notice the contractor replaced the roof between our visits but had somehow missed the requirement to do the wall work, so we were forced to have him do it out of proper sequence. Nonetheless, with proper protection of the new roof, the masonry work was accomplished without compromise to the end result.
I have seen, on more than one occasion, what happens when a new roof system’s flashings are placed above the cavity weeps in a masonry rising wall, causing that wall to drain into the layers of the new roof system. It generally doesn’t leak fast enough to alert the building occupants to the severity of the problem, but it leaks enough to soon saturate and cause a very premature failure of the new roof system.

Be the first to comment on "The Success of Your New (Replacement) Roof Depends on Adjacent and Connected Elements, including Masonry"