

There are almost as many types of chimneys as there are cars, but for this article, I am talking about masonry chimneys, and specifically masonry chimneys protruding through a steep-slope roof. These can take the shape of a simple chimney block unit with a clay flue liner running from the foundation thorough the roof, all the way to massive stone or brick structures with two and three fireplaces built in at different levels of the house. Chimneys can serve as load bearing structures and heating systems for the house. I have worked in homes where the chimneys are constructed so that the hot gas passes up and down through the structure of the chimney to heat the masonry mass before they escape out the chimney top, allowing this heated mass to radiate the heat for hours inside the house to supplement the regular heating system.
Eventually however, the chimney has to pass through the roof and into Mother Nature’s realm, and we as roofers have to deal with keeping rain and snow from working back into the building. Most of this task is accomplished with the flashing system at the roof level, but we need to remember that water and ice can also work through the mass of the chimney itself and cause leakage inside the structure. That is the reason for specifically mentioning masonry chimneys in the title above; when one is dealing with chimneys and water, moisture can be coming from all different angles, and all of these areas need to be addressed.
I distinctly remember being at a local supply house years ago when a roofer ordered “a five-gallon bucket of flashing.” At best, plastic roofing cement is a temporary fix or patch, and eventually it has to come off. In my long career working on roofs, I have worked on thousands of shingle roofs and many hundreds of metal, tile and slate ones, too. I didn’t know whether I laughed or cried when the guy said that, but I did want to scream, “Flashing doesn’t come in a bucket!”
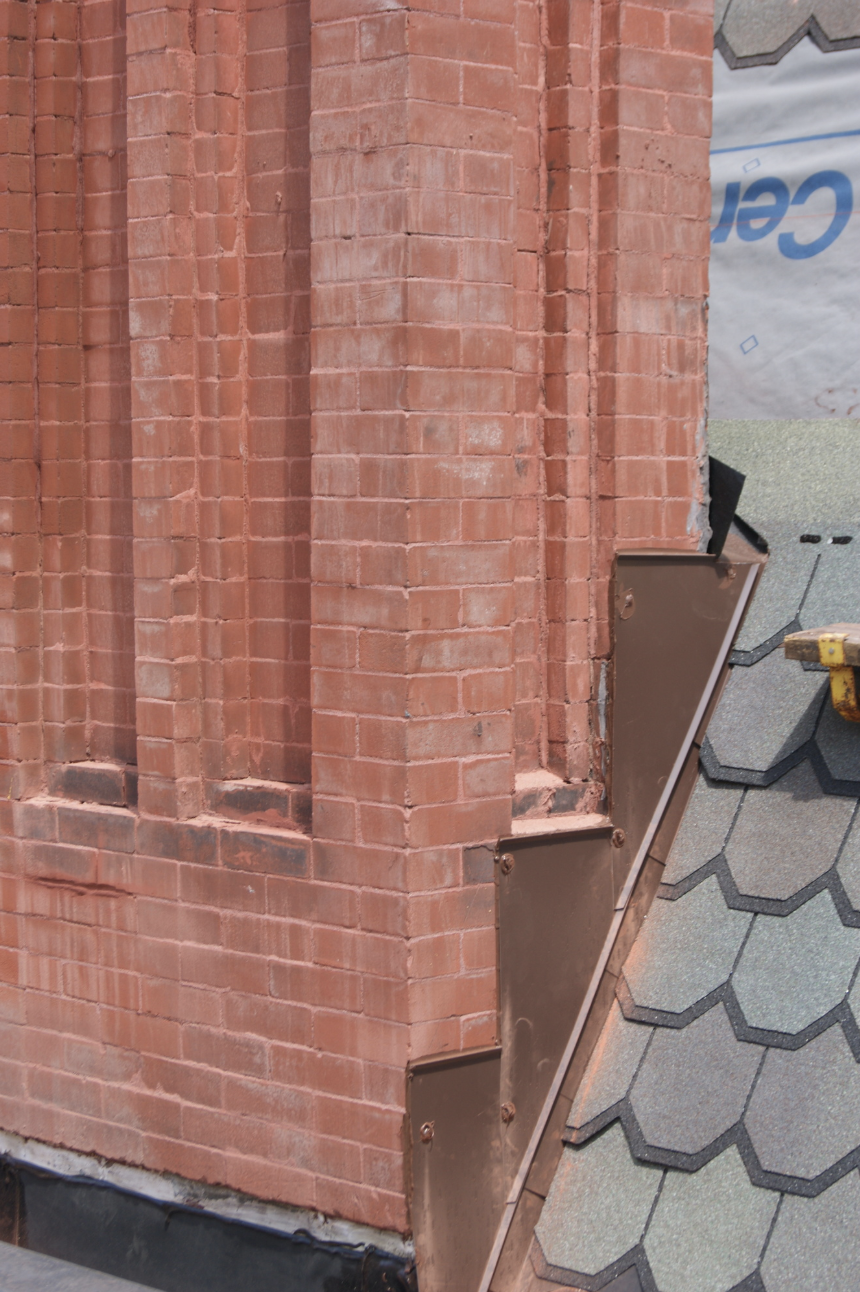
Masonry walls and chimneys bear on their own foundations and they move at different rates than the rest of the building. You have to allow for that movement, and you need to channel the water in the direction you want so that it is easier for it to flow off the roof rather than into it. Permanent flashing allows for the movement with hundreds of places where the metal can move while always at the same time directing the water lower on the plane of the roof and toward the bottom edge. Whatever the type of roofing material used (shingles, tile, slate, metal, thatch, etc.) and whatever type of flashing metal you use, the flashing always has to be lapped so that the water flows in the direction of the overlap. Depending on the slope, the lap has to be sufficient to allow for the worst possible amount of water flow you will encounter. The flatter the pitch, the more overlap you need. At less than 2/12 pitch, we start to deal with “flat roofing,” and that has its own challenges, though the principles are the same.
I could write about a detailed method to flash a chimney, but on every bundle of shingles sold, there are very good details printed and I would dare to say that not one in a million are ever read or even looked at. In this article, I want to explain the reasons why the details specify what they do. In the preceding paragraph, I mentioned that you have to make it easier for the water to flow off the roof rather than into it. That, in essence, is the principle of all flashing — and roofing, for that matter. If you fight the water flow, you will lose 100 percent of the time. Examples of “fighting the water flow” would be for instance lapping the flashings in the wrong direction, or perhaps building a saddle on the backside of a chimney and not extending it far enough sideways so that the water was trapped in the bottom corners. It could also be something as simple as cutting the shingles or slates too tightly against the flashings. As a general rule, always leave about a 3/8-inch gap between the vertical bend of the flashing and the cut of the shingle. This will allow the water to clean out the debris while keeping the joint water tight. Also, don’t jam the counterflashing tight against the horizontal surface of the flashings. This will also restrict the water flow and could cause leakage.
As an interesting aside, one very common mistake I see with cutting valleys is for roofers to not trim back the top corner of a shingle in the valley as shown on all of the packages. The water will catch on that top corner if it is not cut back and track along the top of the shingle until it finds a way into the envelope of the roof. This applies to all valleys, but in this instance, I am specifically speaking of the valleys created when a saddle or cricket is installed behind a chimney. It is also important to not cut the valley shingles in the center of the valley or the low point. Keep the cut line about an inch out of the center of the valley so that the water can again do your work for you by cleaning out the debris. This will also keep the water away from the top corner of the valley shingle.
Problems With Chimneys
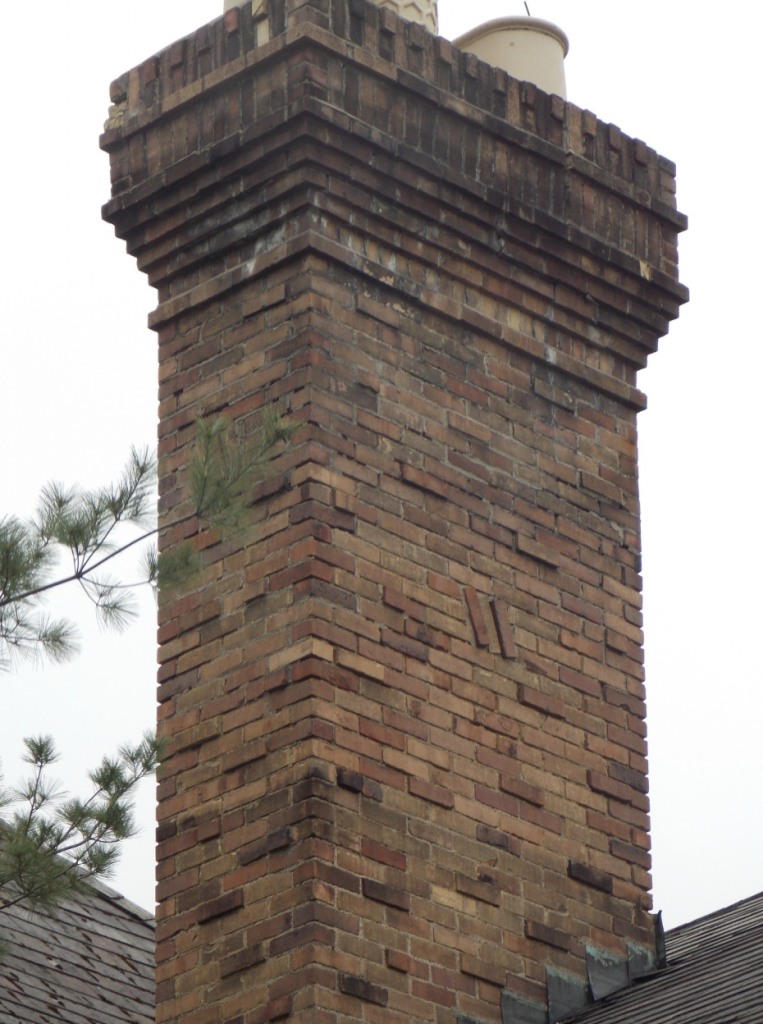
Proper flashing application is crucial, but many of the problems associated with chimney leakage have to do with the chimney itself. Until the advent of the high-efficiency furnaces, most exhaust gasses from the heating of the building went up the flue of the chimney. When more efficient furnaces were introduced, they reduced this gas and excess wasted heat, yet many were vented into the same flue. By definition, a 50 percent efficient furnace puts half of the energy and heat up the flue, while an 80 percent unit would only vent 20 percent of the heat into the same volume, heating the house with the other 80 percent. It takes heat to create the draft necessary to carry moisture out of the chimney. Any gas will cool when it expands, and we are drastically cutting the amount of heat when installing a more efficient furnace. If we don’t reduce the size of the flue, the water vapor can condense back into water before it escapes from the top of the chimney. Mostly, this occurs in the section of chimney directly exposed to the weather, which would be the part sticking out above the roof line. It was common years ago to see the face of a lot of the bricks spalled or breaking off from the rest of the brick. This was caused by the water vapor condensing and then saturating the brick, freezing, expanding and breaking off the surface. If you still have one of the 80 percent units, it is important that you have a smaller flexible metal flue liner installed to reduce the volume and increase the speed with which the gasses escape. This in normally not a problem anymore, as most units now are 95 percent efficient and are vented out the side of the building using a plastic pipe.

Very few of the homes built today even have a masonry fireplace or chimney, mostly because of the type of furnace used and modern codes. Most fireplaces installed today are zero-clearance units and are basically a gas appliance similar to a gas stove. Many of the older homes that still have wood burning fireplaces have switched them to a gas burning unit, and this will cause the same problem as switching the older furnaces if a smaller sleeve is not installed to reduce the volume of the flue. The biggest problem with this switch is that the effects are not immediately apparent, but delayed, often by several years. We worked on a large condominium project in the early 70s that had dozens of large chimneys, most with several fireplaces on different levels. At some time in the 90s, they all had gas inserts installed, without changing the size of the flue liners. Not all of the chimneys had problems; only the ones that used the gas logs. No matter how often they redid the bricks on the tops of the chimneys, they kept on breaking and spalling. The flaws in the brick and cracks in the caps caused by the water vapor freezing and expanding also caused regular leakage in the chimneys by loosening the counter flashings and letting water past the step flashings and head wall flashings. The caveat to be learned here is that there is a cause and effect that occurs for every action taken, and before making a change it is important to do some research and determine what the effects will be and what has to be done to make sure that it doesn’t do more harm than good. When roofing an existing structure, it’s also important to determine what other changes have been made to the structure in the past.
Current building codes and modern engineering make the new homes built more efficient and less prone to these types of problems; however, there are millions of older homes out there that need to be retrofitted or in some case “re-fixed” or “unfixed” to make them work.
The one big advantage we are working with today is that there are very few “roof overs” done on steep-slope roofs, as most districts require that the old roof be removed before a new one is installed. This will allow for all of the flashings to be replaced. If chimneys still exist but are no longer used, the possibility might exist for them to be taken down, having the framing replaced and the opening covered and roofed. If this is done, make sure that you take the chimney down to the height of the ceiling joists, cap it at that point and insulate above it.
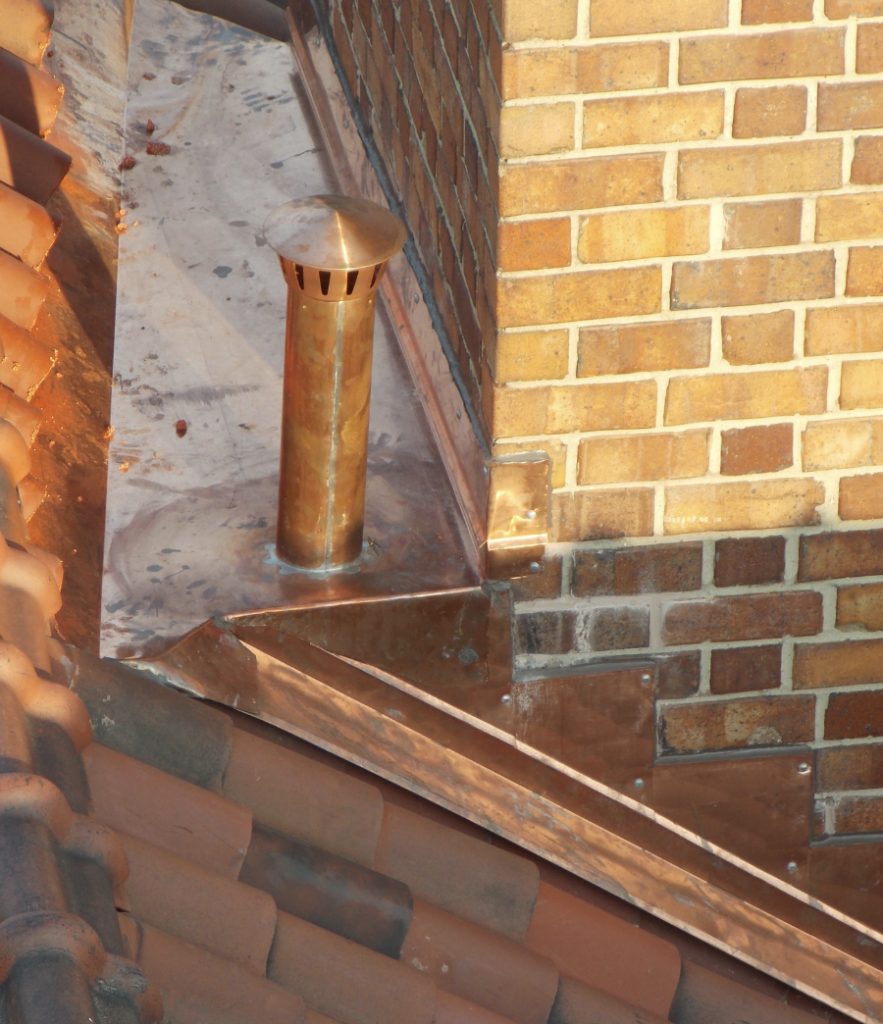
If the chimney is left in place, it is important to have the masonry mass inspected and fixed before the roof is done to avoid damaging the new roof. Install a new flashing/counter-flashing system, and make sure to follow the directions printed on the shingle wrappers. My objective here is not to reinvent the wheel, but to make sense of what they are telling us to do. Many years ago, there was a commercial with a tag line that went “It’s not nice to fool Mother Nature.” The truth is that you can’t. If you work with gravity and nature, on the other hand, you can eliminate a lot of the problems we are fighting with on the roofs and in this business. The choice is yours.
About the Author: John R. Crookston is a roofing contractor and consultant located in Kalamazoo, Michigan. He has more than 60 years of experience in the roofing industry and has written technical articles for a variety of publications under the pseudonym “Old School.”

Be the first to comment on "Understanding Is the Key to Preventing Trouble Spots With Masonry Chimneys"