
Roof system design is supposed to be holistic, taking into account the use of the building, the interior air pressure, roof deck, climate, building geometry and walls — all of which can influence the roof’s performance. “Wait a second,” you say. “What do you mean, walls?!”
Yes, walls. You know, those vertical structures on the exterior side of buildings that direct wind up into the roof system and “poof,” there goes the roof membrane. Wall construction is never given its due in roof system design. Those fluted precast walls, precast walls with beveled joints, structural stud walls, screen wall systems and insulated wall panels can be roof killers!
The influence of walls on the roof system cannot be underestimated, ignored or left to the contractors to figure out in the field. Most of the failures I have seen have been in new construction projects, so I’ll call them like I see them: Most architectural firms perform well below the standard of care in this regard — and in numerous other areas of roofing. (Don’t get me started on my bandwagon.)
The goal of this article is to raise awareness of how wall surface, articulation and design can negatively influence a roof system’s performance and how roof system design needs to take this into consideration and should be explicitly detailed in the drawings.
The following real-world examples demonstrate the detrimental effects of inadequate roof and wall design. Note: Roof warranties exclude stupidity.
Case 1
Building particulars:
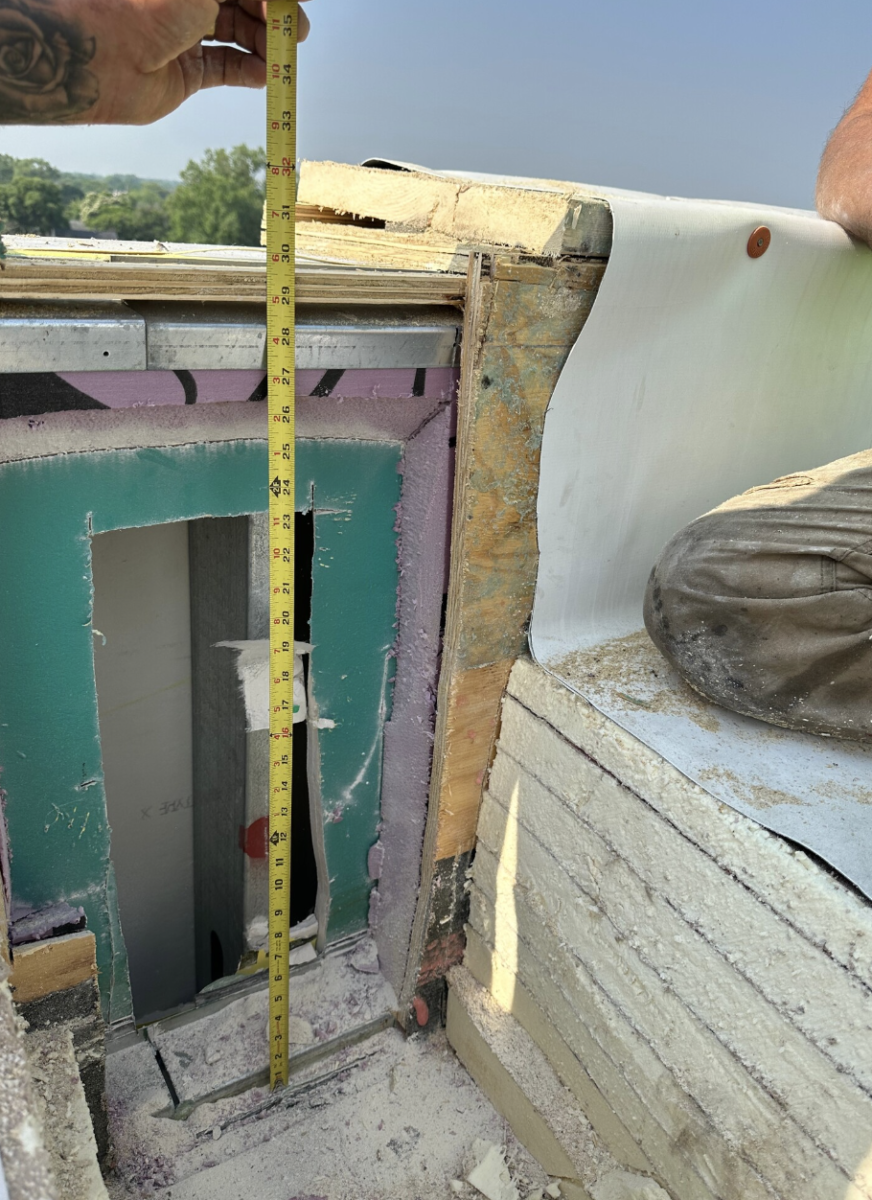
· Precast concrete walls with deep bevel joints and a 42-inch parapet
· 12-inch cast-in-place concrete roof deck
· Insulation in polyurethane foam beads
· Adhered TPO
· Coping overtop of precast
Results:
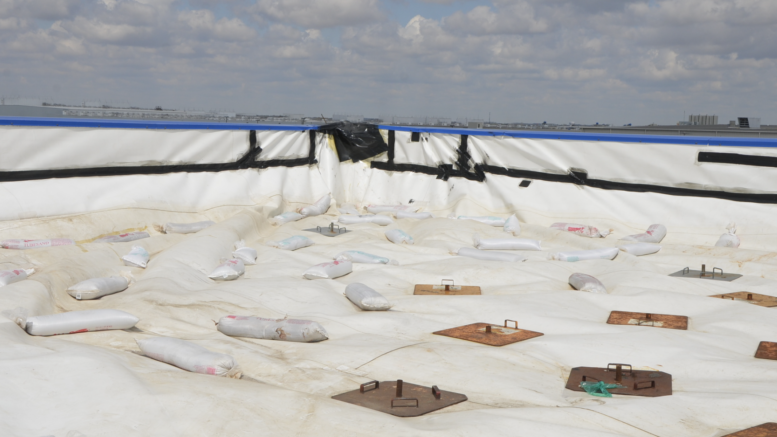
· The roof membrane was 100% delaminated from the insulation. (See Photos 1 and 2.)
· The base flashing was pulled off the windward wall and partially pulled off the adjacent wall.
· The metal coping snapped off the parapet in the corner.
In my humble opinion, here is what was stupidly done:
1. The TPO was not adhered over the top of the parapet and down onto the face of the precast. One of my biggest biases with TPO is its rigidity that prevents taking it up over the wall and onto the face of the wall. Hint: Stop the TPO at the top of the wall and use EPDM to extend over the top of the wall.
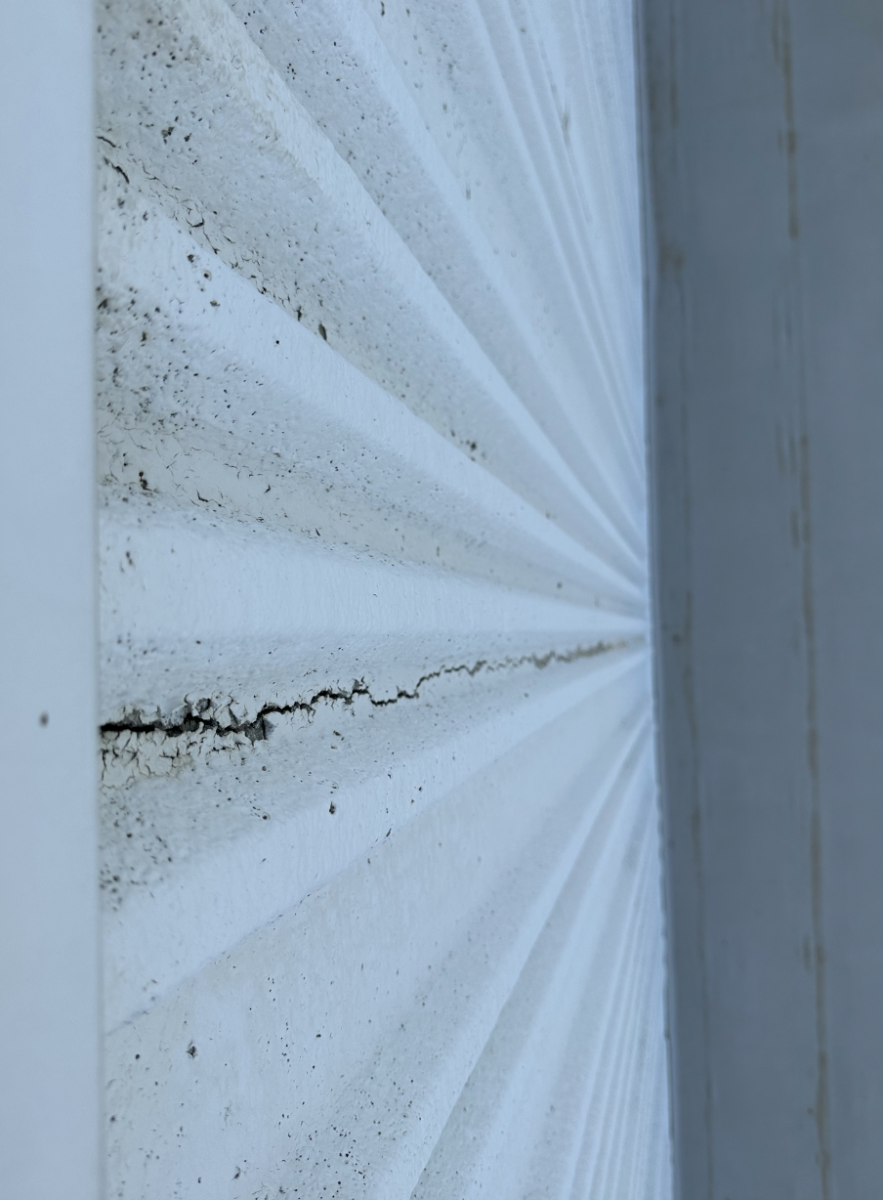
2. The deeply “beveled” precast joints were not made flush with the precast wall face behind the membrane and coping. (See Photo 3.)
3. The steel roof deck was changed from metal to cast-in-place concrete with no change to the roof system.
Aided by a massive amount of upward drying and facer wetting, winds well below the standard warranty speed moved up the precast bevel joint, under the unadhered TPO, down the interior of the wall, and behind the TPO base flashing at the precast joint. The pressure behind the base flashing, in association the outward pulling force of the wind, pulled the base flashing off the wall, pulled it through the stress plates of the base anchor attachment, and started to work on the membrane. The metal coping in the corner was lifted up and fasteners came out of the wall.
I call the wind damage to the membrane a progressive failure. The membrane and base flashing initially sustained some damage, and during each subsequent wind of nominal speed, like pulling tape off the floor, the delamination continued until it was a giant fulcrum and delaminated the entire roof.


Case 2
Building particulars:
· Metal panels on hat channels on metal stud wall that carried up above the roof for a parapet
· Steel roof deck
· Self-adhering vapor retarder
· Adhered TPO
· Positive internal air pressure
Results:
· Shortly after construction the roof membrane detached from the insulation. The cause was attributed to condensation below the TPO and the roof was replaced by the manufacturer, albeit poorly.
· The second roof membrane blew up again, detached from the parapet and blew back. (See Photos 4-7.) The only item that kept it from blowing completely off the building was the stainless-steel tie-off cable.
· Insulation came loose and blew from the roof.
· The substrate board and vapor retarder came up off the roof deck.
In my humble opinion, here is what was stupidly done:
1. The vapor retarder was poorly adhered.
2. Poor construction on the replacement work did not include removing the coping and existing base flashing.
3. The metal stud wall was clad in gypsum-based sheathing. There was no metal sheeting to which the base flashing anchors could engage. Hint: Fasteners that you can pull out by hand do not constitute a good detail for roof membranes.
4. The steel roof deck flutes were translated into the perimeter parapet.
5. Metal wall panels allowed air intrusion into the stud cavity wall.
6. The TPO was not adhered over the top of the parapet and down onto the face of the metal wall panels.
Wind passing through the metal panels into the stud wall pressurized the cavity. The weak point was the roof side parapet, which blew out. Once air was able to intrude below the roof membrane, all bets were off.
When the roof was replaced, the roof edge design was in-depth, strengthened, and sealed the parapet from air intrusion from both the interior and the exterior.


Case 3
This one may be my favorite.
Building particulars:
· Fluted pre-cast wall panels
· Precast concrete tees
· Self-adhering vapor retarder
· Adhered EPDM
· Positive internal air pressure
Results:
· This roof cannot stay put. It has blown up three times now. (See Photos 8-11.) I first saw this roof 11 years ago after the second wind event and feel that I correctly diagnosed the issues to be addressed, but I was not retained to provide the solution. I was bummed. There is nothing better, though, than being passed over and then brought back because the owner made a mistake.
While there are several crucial factors involved with the building, the following are main points:
1. Fluted precast wall panels faced west into the prevailing storm line. The walls are tall and there is no windbreak for hundreds of miles. Yes, this building is in the middle of nowhere.
2. The roof base flashing, because of the flutes, cannot be adhered to the exterior side of the wall. (But who requires that!)
3. The base flashing stopped at the edge of the flutes.
4. The coping came over the flutes.
Winds hit the wall, shot up the flutes to the underside of the exposed wood blocking, being compressed by the coping. Air was driven below the wood blocking, to the back of the base flashing, into the roof system and “poof.”
The precast wall panel open cores allowed 110°F air to move up to the wood, which in the winter is cold. Condensation resulted — a lot of condensation — which dripped behind the base flashing to the membrane, with the insulation interface losing the bond.
Details to replace the roof included insulating the parapet and walls between roofs, grouting the open cores, and what should have been designed — cutting off the flutes at the roof edge so that the new base flashing could be adhered, too.


Case 4
Building particulars:
· Cement panel screen wall.
· Not sealed at top
· Metal stud walls
· Adhered TPO
· Positive internal air pressure
Results:
· The roof has membrane has delaminated twice. The wall system looks like it was designed to move air up to the parapet and into the roof system. The roof membrane came up shortly after construction and then again after the reroofing of the building. (See Photos 12-14.) There were all kinds of things going on with this project. I love stud walls — who needs a marketing program when you have them?
In my humble opinion, this is what was stupidly done:
1. The screen wall was installed on hat channels that created a cavity behind the screen wall but was not designed to be sealed at the top.
2. The wood blocking at the top of the parapet wall did not cover the screen wall.
3. The base flashing was not taken over the wood and sealed to the wall’s weather-resistant barrier, but then TPO does not bend well, and would never have stayed put. Hint: As noted above, when using TPO, use EPDM to seal the top of the roof edge.
The stud wall as detailed to the roof allowed air movement into the system. A ballasted solution would have been a good option, but the roof structure would not have supported it. Design solutions — should I say cost-effective design solutions — are being worked on now.


Final Thoughts
Design professionals can be like proverbial ostriches with their heads in the sand when it comes to the integration of the roof system and wall system. While experience helps, some of these causes of wind events are a simple understanding of what happens when wind comes in contact with the wall. Positively pressured interior air needs to be contained below the roof deck. A vapor retarder at the roof deck level is not enough. The transition at the roof edge and over the to the wall needs to be considered. The standard of care is not what everyone else is doing (because it’s generally wrong) but to seek out and arrive at correct solutions, which need to be specifically detailed. Leaving the design to the contractors is a recipe for disaster.
About the author: Thomas W. Hutchinson, AIA, CSI, Fellow-IIBEC, RRC, is a principal of Hutchinson Design Group Ltd. in Barrington, Illinois. For more information about the company, visit hutchinsondesigngroup.com.

Be the first to comment on "Wall Design Can Negatively Influence Roof System Performance"